Follow Me On Social Media!

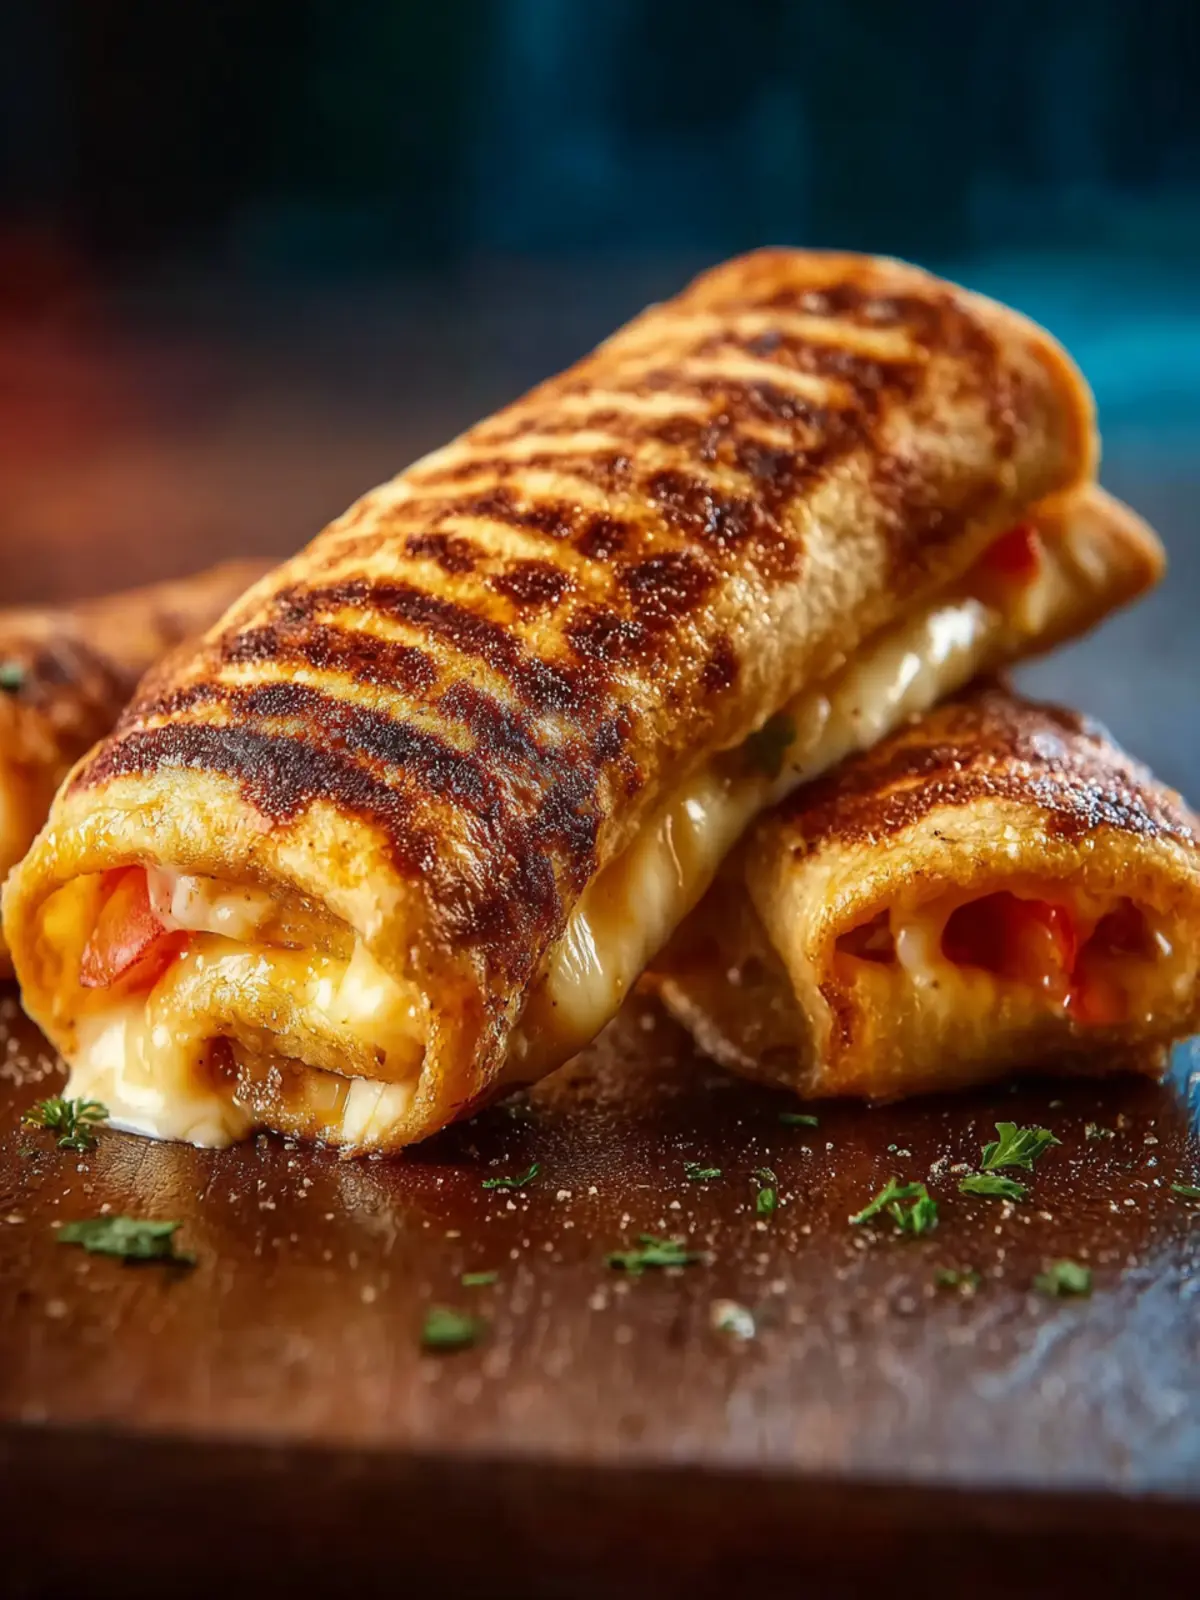
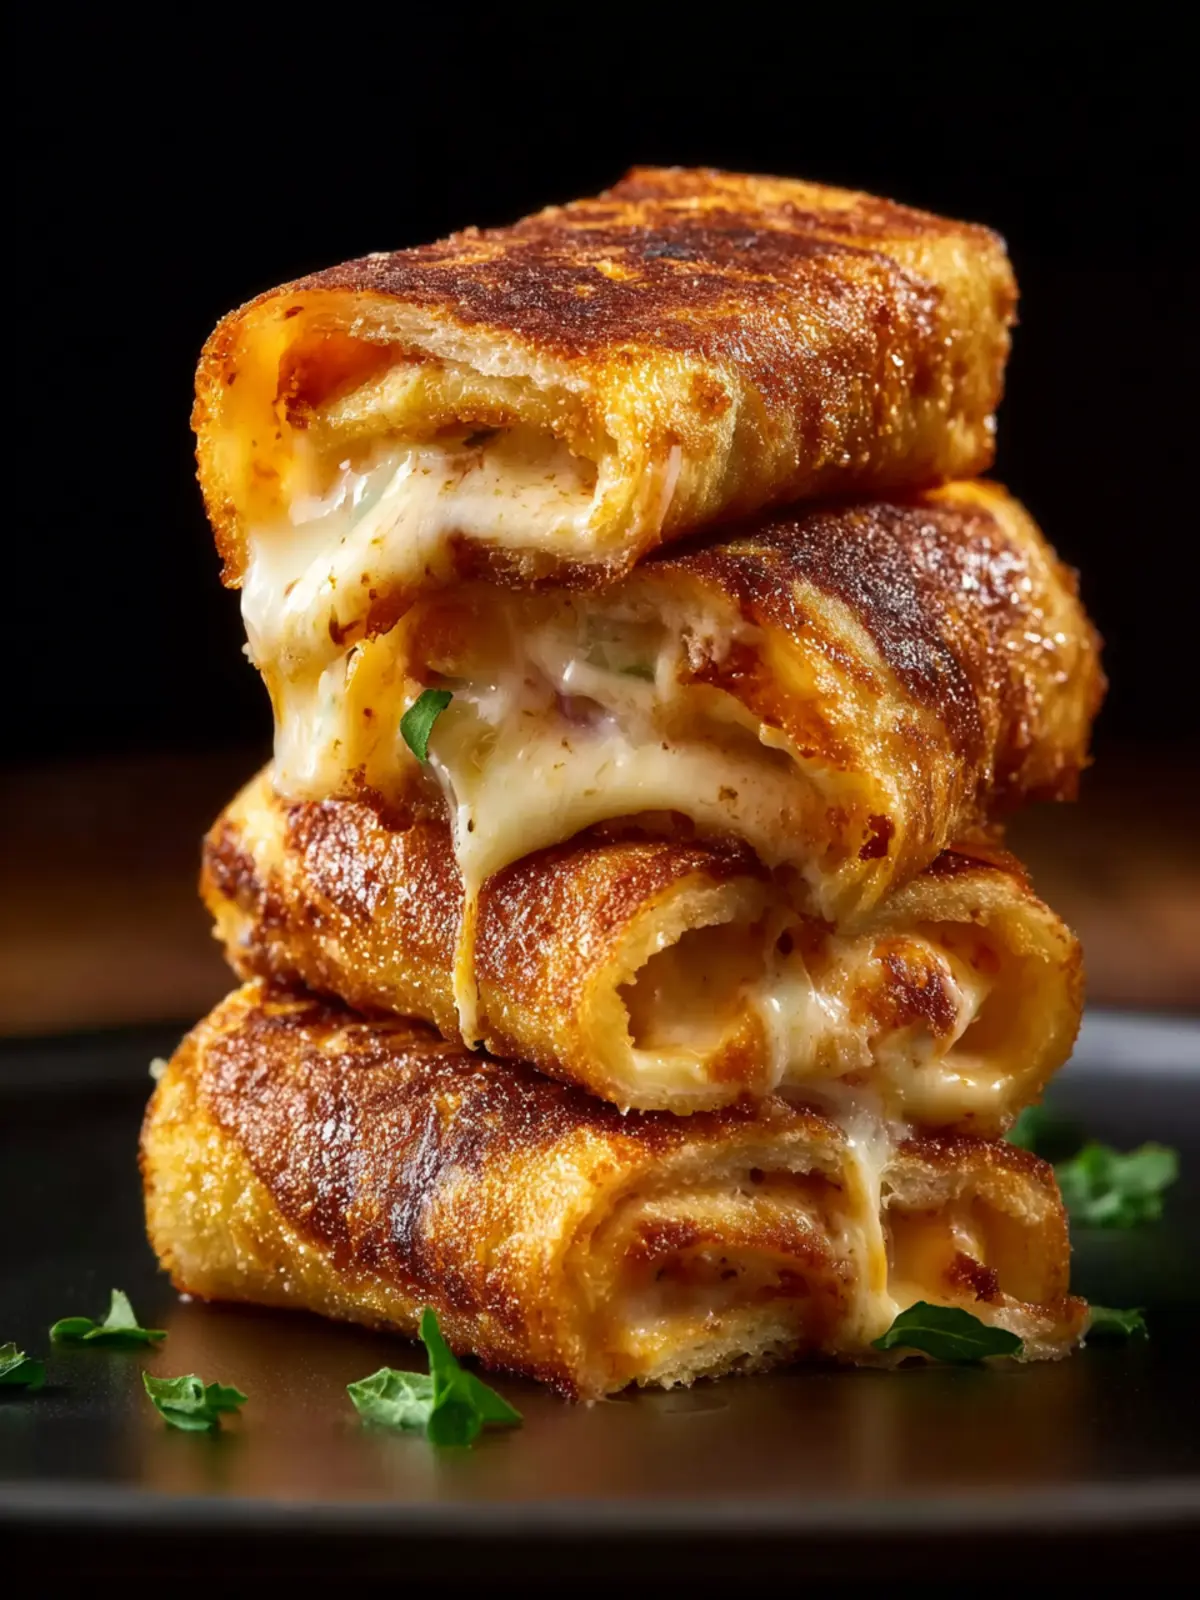
Grilled Cheese Roll Ups: Irresistibly Gooey and Fun to Make
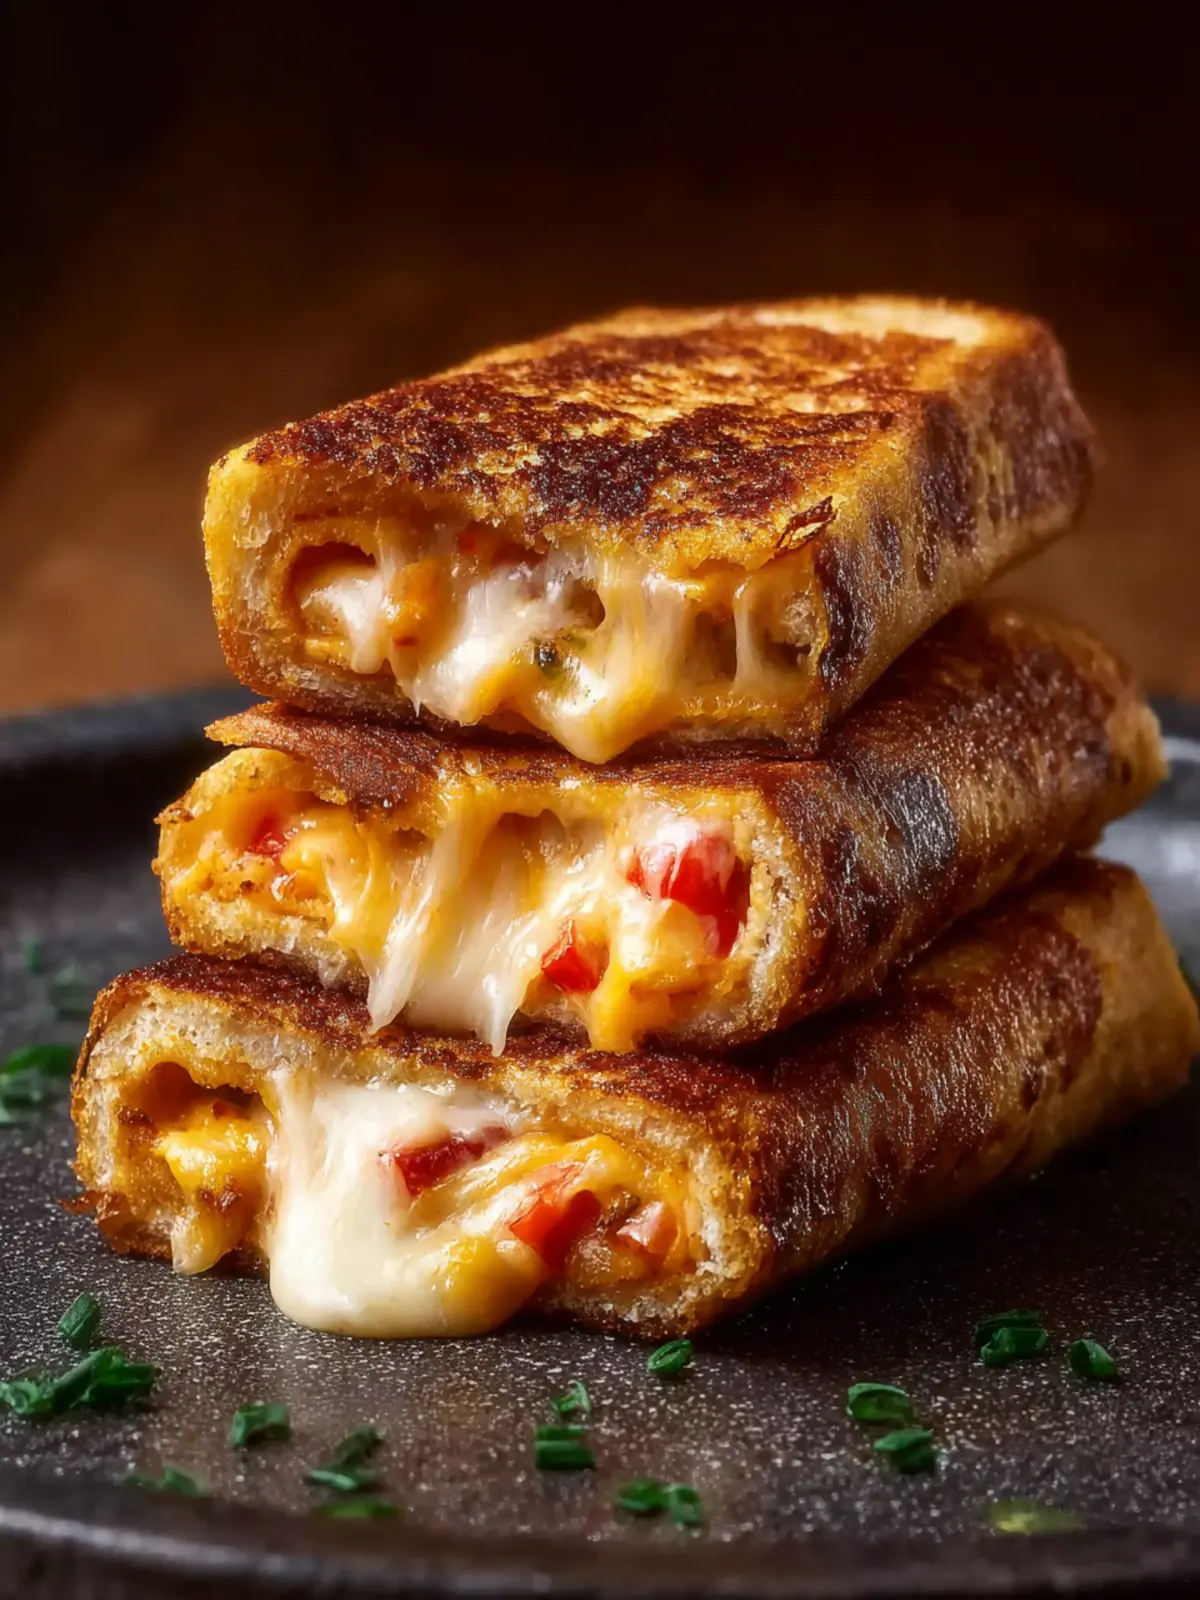
Introduction to Grilled Cheese Roll Ups
Grilled cheese roll ups are the ultimate blend of nostalgia and culinary innovation. Picture this: you’re settling on the couch after a long day, and the thought of a classic grilled cheese sandwich creeps into your mind. But what if you could elevate that classic comfort food into something even more fun and delectable? Enter grilled cheese roll ups—an exciting twist that turns your favorite cheese-filled delight into a portable, crispy treasure.
This recipe invites you into the world of grilled cheese in a unique way, bringing together the gooey goodness of melted cheese with the satisfying crunch of perfectly toasted bread. Imagine rolling up your favorite cheese in soft tortillas, then grilling them until golden brown. The crunch of the exterior paired with the ooey-gooey cheese on the inside creates a flavor experience that’s both familiar and refreshing. Whether you’re a busy professional looking for a quick snack or a parent trying to please picky eaters, grilled cheese roll ups make for a perfect choice.
What makes Grilled Cheese Roll Ups so irresistible?
The allure of grilled cheese roll ups lies not just in their delightful taste but also in their versatility. You can customize your roll ups with various fillings—think pepperoni, jalapeños, or even avocado for a twist. Why limit yourself to plain old sandwiches when you can experiment with flavors and textures?
- Cheerful Comfort Food: No matter the age, the delight of cheesy, melty goodness wrapped in a crispy exterior brings joy to everyone who takes a bite.
- Quick and Easy: With minimal ingredients and steps, you can whip these up in no time after a long day, making them perfect for busy weeknights.
- Portable Snacks: Unlike traditional grilled cheese sandwiches, the roll ups are easy to hold and eat on the go, ideal for lunch boxes or picnics.
So, whether you’re reliving childhood memories or introducing a new generation to the joy of grilled cheese roll ups, you’re in for a treat that covers all bases.

Key Ingredients for Grilled Cheese Roll Ups
Bread: To achieve the ultimate Grilled Cheese Roll Ups, I recommend using white sandwich bread. Its softness makes it easy to roll, but feel free to experiment with whole wheat for a nuttier flavor. The bread should be fresh but not overly soft to maintain its shape when filled.
Cheese: Go for a mix of sharp cheddar and melty mozzarella. This combination provides a rich, gooey texture that’s essential for that classic cheese pull we all crave. If you’re feeling adventurous, try adding a little pepper jack for a spicy kick.
Butter: A generous spread of unsalted butter on the outside ensures a golden-brown crust with a delightful crispness. You can even mix in a little garlic powder for extra flavor if you’d like.
Optional additions: While not necessary, feel free to add thin slices of ham or turkey for a heartier option. Spinach or basil can add a pop of freshness that balances out the richness of the cheese, making your Grilled Cheese Roll Ups even more satisfying.
Why You’ll Love Grilled Cheese Roll Ups
Imagine biting into a warm, gooey Grilled Cheese Roll Up, where the crispiness of perfectly toasted bread seamlessly envelops melty cheese. From the first bite, you’ll be whisked away to your childhood, evoking memories of cozy lunches and carefree days. These delightful roll-ups not only capture the nostalgic taste of traditional grilled cheese sandwiches but also offer a fun twist that elevates a classic favorite.
Quick to Prepare
One of the best aspects of Grilled Cheese Roll Ups is how easily they come together. With just a handful of ingredients, you can create a satisfying snack or meal in no time. Perfect for busy weeknights or spontaneous gatherings, these roll-ups require minimal effort while delivering maximum flavor.
Versatile and Customizable
These cheesy treats are incredibly versatile. Whether you want to stick with the classic cheese pull or experiment with different fillings such as pepperoni, spinach, or even a hint of jalapeño, the choices are endless. This makes Grilled Cheese Roll Ups an excellent option for varying tastes and dietary preferences.
Kid-Approved
If you’re looking to entice picky eaters, these roll-ups can be an instant hit. Kids find them fun to eat, and you can sneak in some veggies without them noticing! Plus, they’re perfect for lunchboxes or after-school snacks.
In short, once you try Grilled Cheese Roll Ups, they’re bound to become a beloved staple in your kitchen repertoire.
Variations on Grilled Cheese Roll Ups
Exploring Grilled Cheese Roll Ups opens up a delightful world of flavor and creativity. It’s fascinating how something so simple can be dressed up in various delightful ways. Let’s dive into some fun variations that will make your taste buds dance!
-
Classic Spinach and Artichoke: Incorporate a mix of sautéed spinach and artichoke hearts with your cheese for a rich, creamy twist. Not only does it add a pop of color, but it also packs in nutritious greens that make every bite feel indulgent yet wholesome.
-
Spicy Pepper Jack and Jalapeño: For those who crave a kick, swap out the traditional cheese for pepper jack and add sliced jalapeños. This combination provides a mouthwatering spicy and cheesy experience that pairs well with a cooling dip.
-
Sweet and Savory with Fig Jam: Try adding a layer of fig jam or apple butter between the cheese and the bread before rolling. This unexpected touch offers a delightful blend of sweet and savory, perfect for elevating your appetizer game.
With these variations, your Grilled Cheese Roll Ups can cater to every craving and occasion!
Cooking Tips and Notes for Grilled Cheese Roll Ups
Creating Grilled Cheese Roll Ups is not just about simplicity—it’s also an opportunity to indulge in deliciousness while having fun in the kitchen. This delightful fusion of grilled cheese and a hand-rolled twist is sure to impress anyone on your lunch or snack list. Here are some tips to elevate your experience:
Choosing the Right Bread
Opt for bread that has a bit of structure, like sourdough or whole grain. This will hold up to rolling and prevent tearing. If using sandwich bread, slightly flatten it with a rolling pin for easier rolling and a better-toasting experience.
Cheese Matters
For the Grilled Cheese Roll Ups, I recommend using a mix of cheeses—sharp cheddar for flavor and mozzarella for that beautiful stretch. Don’t be afraid to experiment with different cheeses based on your preference. A blend can make all the difference!
Experiment with Fillings
While cheese is the star, consider adding cooked bacon, spinach, or even a hint of mustard for an upgraded flavor. Get creative and adapt based on what’s in your fridge!
Cooking Technique
Make sure your skillet is hot enough before you add the roll-ups. This ensures crispy exteriors and melty interiors. A medium heat usually works best; if it’s too hot, the outside will burn before the cheese melts.
Dipping Sauce
Pair your Grilled Cheese Roll Ups with a side of creamy tomato soup or your favorite dipping sauce for a comforting twist. Homemade or store-bought, it’s the perfect accompaniment!
Remember, the joy of cooking comes with exploration, so feel free to take these tips and make this dish your own!
Serving Suggestions for Grilled Cheese Roll Ups
Elevating your Grilled Cheese Roll Ups isn’t just about the melty cheese—it’s also about how you serve and enjoy them. Picture this: you’ve just whipped up a batch of delicious roll-ups, and your friends are gathering around. Here’s how to make it memorable.
Pairs Well with Dipping Sauces
Transform each bite of your Grilled Cheese Roll Ups into an exciting taste experience. Dip them in:
- Classic Tomato Soup: Nothing beats the traditional combo; it adds a warm and comforting touch.
- Spicy Sriracha Mayo: Add a kick by mixing mayonnaise with Sriracha for the daring taste buds.
- Avocado Cream: Blend avocado with lime juice and a pinch of salt for a refreshing contrast.
Perfect for Any Occasion
These roll-ups are ideal for casual gatherings, movie nights, or even brunch with friends. Serve them as finger foods at a party or alongside a simple salad for a delightful main course. The versatility of Grilled Cheese Roll Ups truly shines here, making them an easy crowd-pleaser!
Remember, it’s all about creating an enjoyable atmosphere, so get creative and have fun with your presentation!
Time Breakdown for Grilled Cheese Roll Ups
Creating the perfect Grilled Cheese Roll Ups can be a delightful experience, especially when you know exactly how to manage your time in the kitchen. This easy finger food is sure to impress, whether it’s for a casual dinner or a fun game night snack. Here’s how to break it down:
Preparation Time
The prep for these delicious roll-ups is quick and simple. Expect to spend about 10 minutes gathering your ingredients and getting everything ready.
Cooking Time
Once your roll-ups are prepped, they’ll need about 10-12 minutes on the stove until they turn that perfect golden brown, crisping up nicely.
Total Time
In total, you’ll be looking at around 20-25 minutes from start to finish. That’s pretty quick for such a crowd-pleaser! Enjoy your time cooking and savor each cheesy bite of your Grilled Cheese Roll Ups!
Nutritional Facts for Grilled Cheese Roll Ups
Creating Grilled Cheese Roll Ups not only satiates your cravings but can also fit seamlessly into a balanced diet when considered mindfully. Here’s a quick dive into the nutritional profile of these delicious bites:
Calories
Each serving of Grilled Cheese Roll Ups typically contains around 250 calories, which makes it a satisfying yet reasonable option for a snack or light meal. You can enjoy this cheesy delight without derailing your dietary goals.
Protein
With about 10 grams of protein per serving, these roll ups provide a worthwhile protein boost. Coupled with the cheese’s rich calcium content, it makes for a filling snack that can help keep you satisfied between meals.
Sodium
One thing to be aware of is the sodium content, which can range between 500-700 mg per serving. This is something to consider if you’re watching your sodium intake, so be mindful of your overall daily consumption while enjoying these cheesy treats.
In summary, while indulging in Grilled Cheese Roll Ups, it’s beneficial to strike a balance between enjoying their deliciousness and being aware of the nutritional aspects!
FAQs About Grilled Cheese Roll Ups
When craving something warm and cheesy, Grilled Cheese Roll Ups come to the rescue. These fun little bites blend the comfort of traditional grilled cheese with a unique twist, making them perfect for snacking, parties, or a quick meal. If you have questions, you’re in the right place! Here are some common queries.
What can I serve with Grilled Cheese Roll Ups?
Pairing your Grilled Cheese Roll Ups with the right sides can elevate your meal. Here are some excellent options:
- Tomato Soup: The classic combination never fails to please. A warm bowl enhances the cheesy goodness.
- Salad: A fresh, crisp salad balances the richness of the roll-ups. Try a simple Caesar or a mixed green salad.
- Pickles or Olives: Their briny flavor adds a delightful contrast to the cheese.
How can I make my roll-ups healthier?
Want to enjoy Grilled Cheese Roll Ups but looking for a healthier spin? Here are some suggestions:
- Whole Grain Bread: Swap white bread for whole grain to boost fiber.
- Low-Fat Cheese: Opt for reduced-fat cheese options to cut down on calories while keeping the flavor.
- Add Vegetables: Include spinach, tomato slices, or bell peppers in your roll-ups for extra nutrients and flavor.
Can I prepare Grilled Cheese Roll Ups in advance?
Absolutely! Preparing a batch of Grilled Cheese Roll Ups in advance is a great time-saver. Here’s how:
- Make Ahead: Assemble but don’t cook your roll-ups. Store them in an airtight container in the fridge for up to 24 hours.
- Reheat: When you’re ready to enjoy, simply cook them in a skillet until golden brown and melty.
These tips can make your Grilled Cheese Roll Ups experience even more enjoyable, whether you’re serving a crowd or just indulging in a solo snack!
Conclusion on Grilled Cheese Roll Ups
Grilled cheese roll ups are not just a delightful twist on the classic sandwich, but a fun and versatile option for any meal. Whether you’re serving them as a quick lunch, a satisfying snack, or even an appetizer for a gathering, they truly shine. Think of them as your go-to recipe for busy weeknights or cozy weekends—simple, delicious, and perfect for sharing. With just a few simple ingredients, you can whip up a batch that will impress friends and family alike. So, why not gather some bread and cheese and roll into a cheese-filled adventure today? You won’t regret it!
Print
Cheese Roll-Ups
- Total Time: 17 minutes
- Yield: 4 servings 1x
Description
Delicious cheese-filled roll-ups that are easy to make and perfect for dipping!
Ingredients
Scale
- 8 slices white sandwich bread (soft, not too thick)
- 8 slices cheese (cheddar, mozzarella, or a combo)
- 2 tablespoons butter (softened)
Instructions
- Prepare the Bread: Start by trimming the crusts off your bread slices. This helps the roll-ups seal better and look neater. Then, using a rolling pin, gently flatten each slice. This step is key to making them pliable for rolling.
- Add the Cheese: Place one slice of cheese onto each piece of flattened bread. If your cheese is larger than the bread, simply trim it to fit or let it slightly overhang for extra melty goodness.
- Roll It Up: Starting from one end, tightly roll the bread up around the cheese. Press lightly to seal. If needed, you can use a dab of butter to help keep the edge closed.
- Butter and Grill: Heat a non-stick skillet over medium heat. Lightly butter the outside of each roll-up. Place them seam-side down into the hot pan. Cook, turning often, until all sides are golden brown and crisp—about 5–7 minutes.
- Serve Warm: These are best eaten hot off the skillet when the cheese is melted and gooey. Serve with tomato soup, ketchup, ranch dressing, or your favorite dipping sauce.
Notes
- These roll-ups can be served as a snack or appetizer.
- Experiment with different types of cheese for varied flavors.
- Prep Time: 10 minutes
- Cook Time: 7 minutes
- Category: Appetizer
- Method: Skillet
- Cuisine: American
Nutrition
- Serving Size: 2 roll-ups
- Calories: 300
- Sugar: 2g
- Sodium: 610mg
- Fat: 19g
- Saturated Fat: 10g
- Unsaturated Fat: 7g
- Trans Fat: 0g
- Carbohydrates: 26g
- Fiber: 1g
- Protein: 10g
- Cholesterol: 40mg